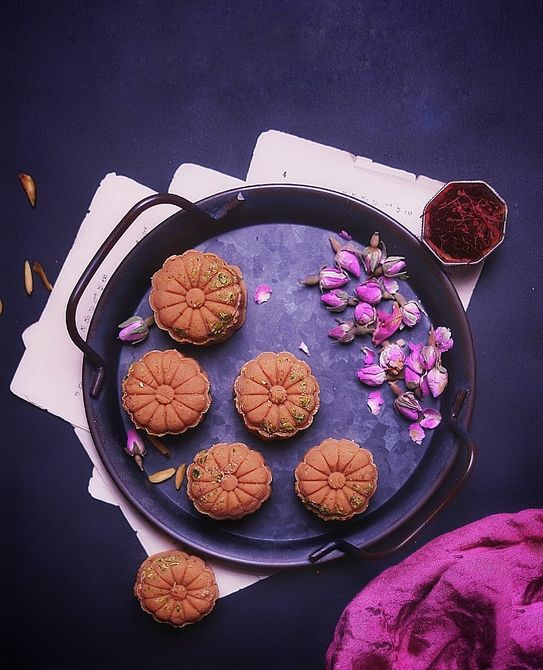
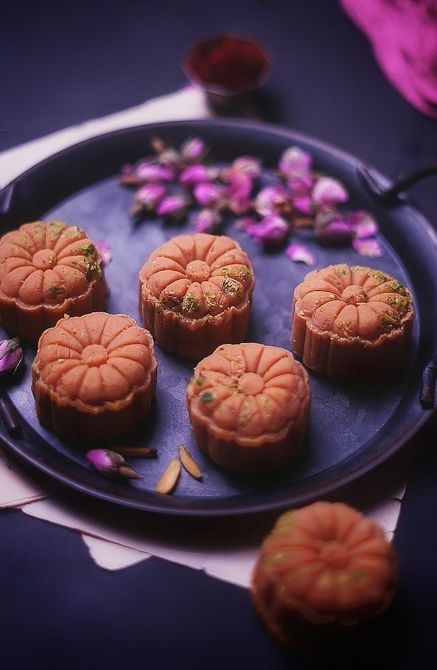

Khoya Badam Peda / Milk Almond Fudge.
I'm a huge Peda junkie😛 As long as they aren't overly sweet, I enjoy them in all forms. My absolute favorite is most famous Shirdi Prasadam Milk Pedas 😚 - Now Khowa / khoya Badam peda is one of my recent favorite sweet, I have a pack of Khowa left in my freezer for months without touching, so decided to make and use it of before it expires.
🌸
I know Peda making takes time and lot of arm work with the constant stirring, but at the end it’s worth it...!! Once you make this, I guarantee you are never going to regret it.
and I like to add in fun colors and shapes for Indian desserts. Because it’s just so easy and something to do and also because people always stop an comment on how cool and pretty they are.. I LOVE THOSE COMMENTS 🙈and For the khoya badam peda, I used my favorite moon cake press bought from Amazon UK. I’m obsessed with this press now 😚 it's so easy to use, and turn out perfect, every time. and If you'd like to try this khoya Badam Peda recipe.
🌸
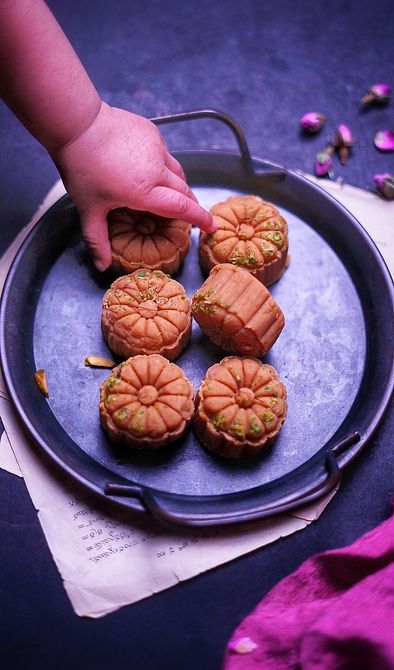
Also, This post is very precious to me as you can see my little Naioni's hand who was trying to steal the peda on her own without any permission and I just wanted to freeze that moment for memory. 🧿
Ingredients:
- 1 cup grated khoya/ mawa
- 1 cup ground almond
- 1/2 cup sugar
- 1/4 cup milk
- 1/4 cup ghee
- 1/2 teaspoon cardamom powder
- pinch of salt
Preparation Method:
- In a heavy bottom skillet at medium heat, add the grated khoya and milk. Keep stirring until it the khoya turns into a smooth texture.
- Add the sugar, ground almond and ghee and keep stirring until it all comes together into a dough that doesn't stick to the pan.
- It should take roughly 15 minutes. Switch off the flame.
- Take the dough to a plate and spread it out to cool off slightly, so you can handle it to shape the pedas.
- Take a small portion as per your liking and press it between your palm to smoothen the texture and shape it into a ball. Then, if you are using any design like a cookie presser then press it down gently.
- Leave the peda aside for an hour to cool it off completely, after which the shape will retain.
- Store the completely cooled peda in a clean airtight jar.
Notes:
- Do not increase the heat and do not leave the skillet unattended. You have to stir constantly or else it will get burnt at the bottom.
- To test if the dough is ready, switch off the heat and take a tiny amount of the dough on a plate. Give a few minutes for it to cool down, so you can handle it comfortably. Try to shape the dough into a ball. If it forms the shape and doesn't stick to your finger, the dough is ready.